How to Schedule a Python Script using Windows Task Scheduler
In this tutorial, you will schedule a run of a Python script using the Windows Task Scheduler.
Step-by-Step Example
Step 1: Prepare a Python Script
Let's say, you want a Python script that copies a CSV file name fish.csv located on your desktop to a folder called Backups on your desktop. It may look like this:
from datetime import date
import os
import shutil

today = date.today().strftime("%Y%m%d")
desktop_path = os.path.expanduser("~/Desktop")
source = f"{desktop_path}/fish.csv"
target = f"{desktop_path}/Backups/fish-{today}.csv"

shutil.copyfile(source, target)
Step 2: Prepare a Batch File that Runs the Python Script
This batch file should run the Python script when opened. It should look something like this:
"Path-to-your-python\python.exe" "C:\Users\...\Desktop\Scripts\backup.py"
pause
To find the path to your Python, refer to our batch file tutorial.
Move this file to your Scripts folder:
C:\Users\DataToFish\Desktop\Scripts\backup.bat
Step 3: Schedule the Run of the Python Script using the Task Scheduler
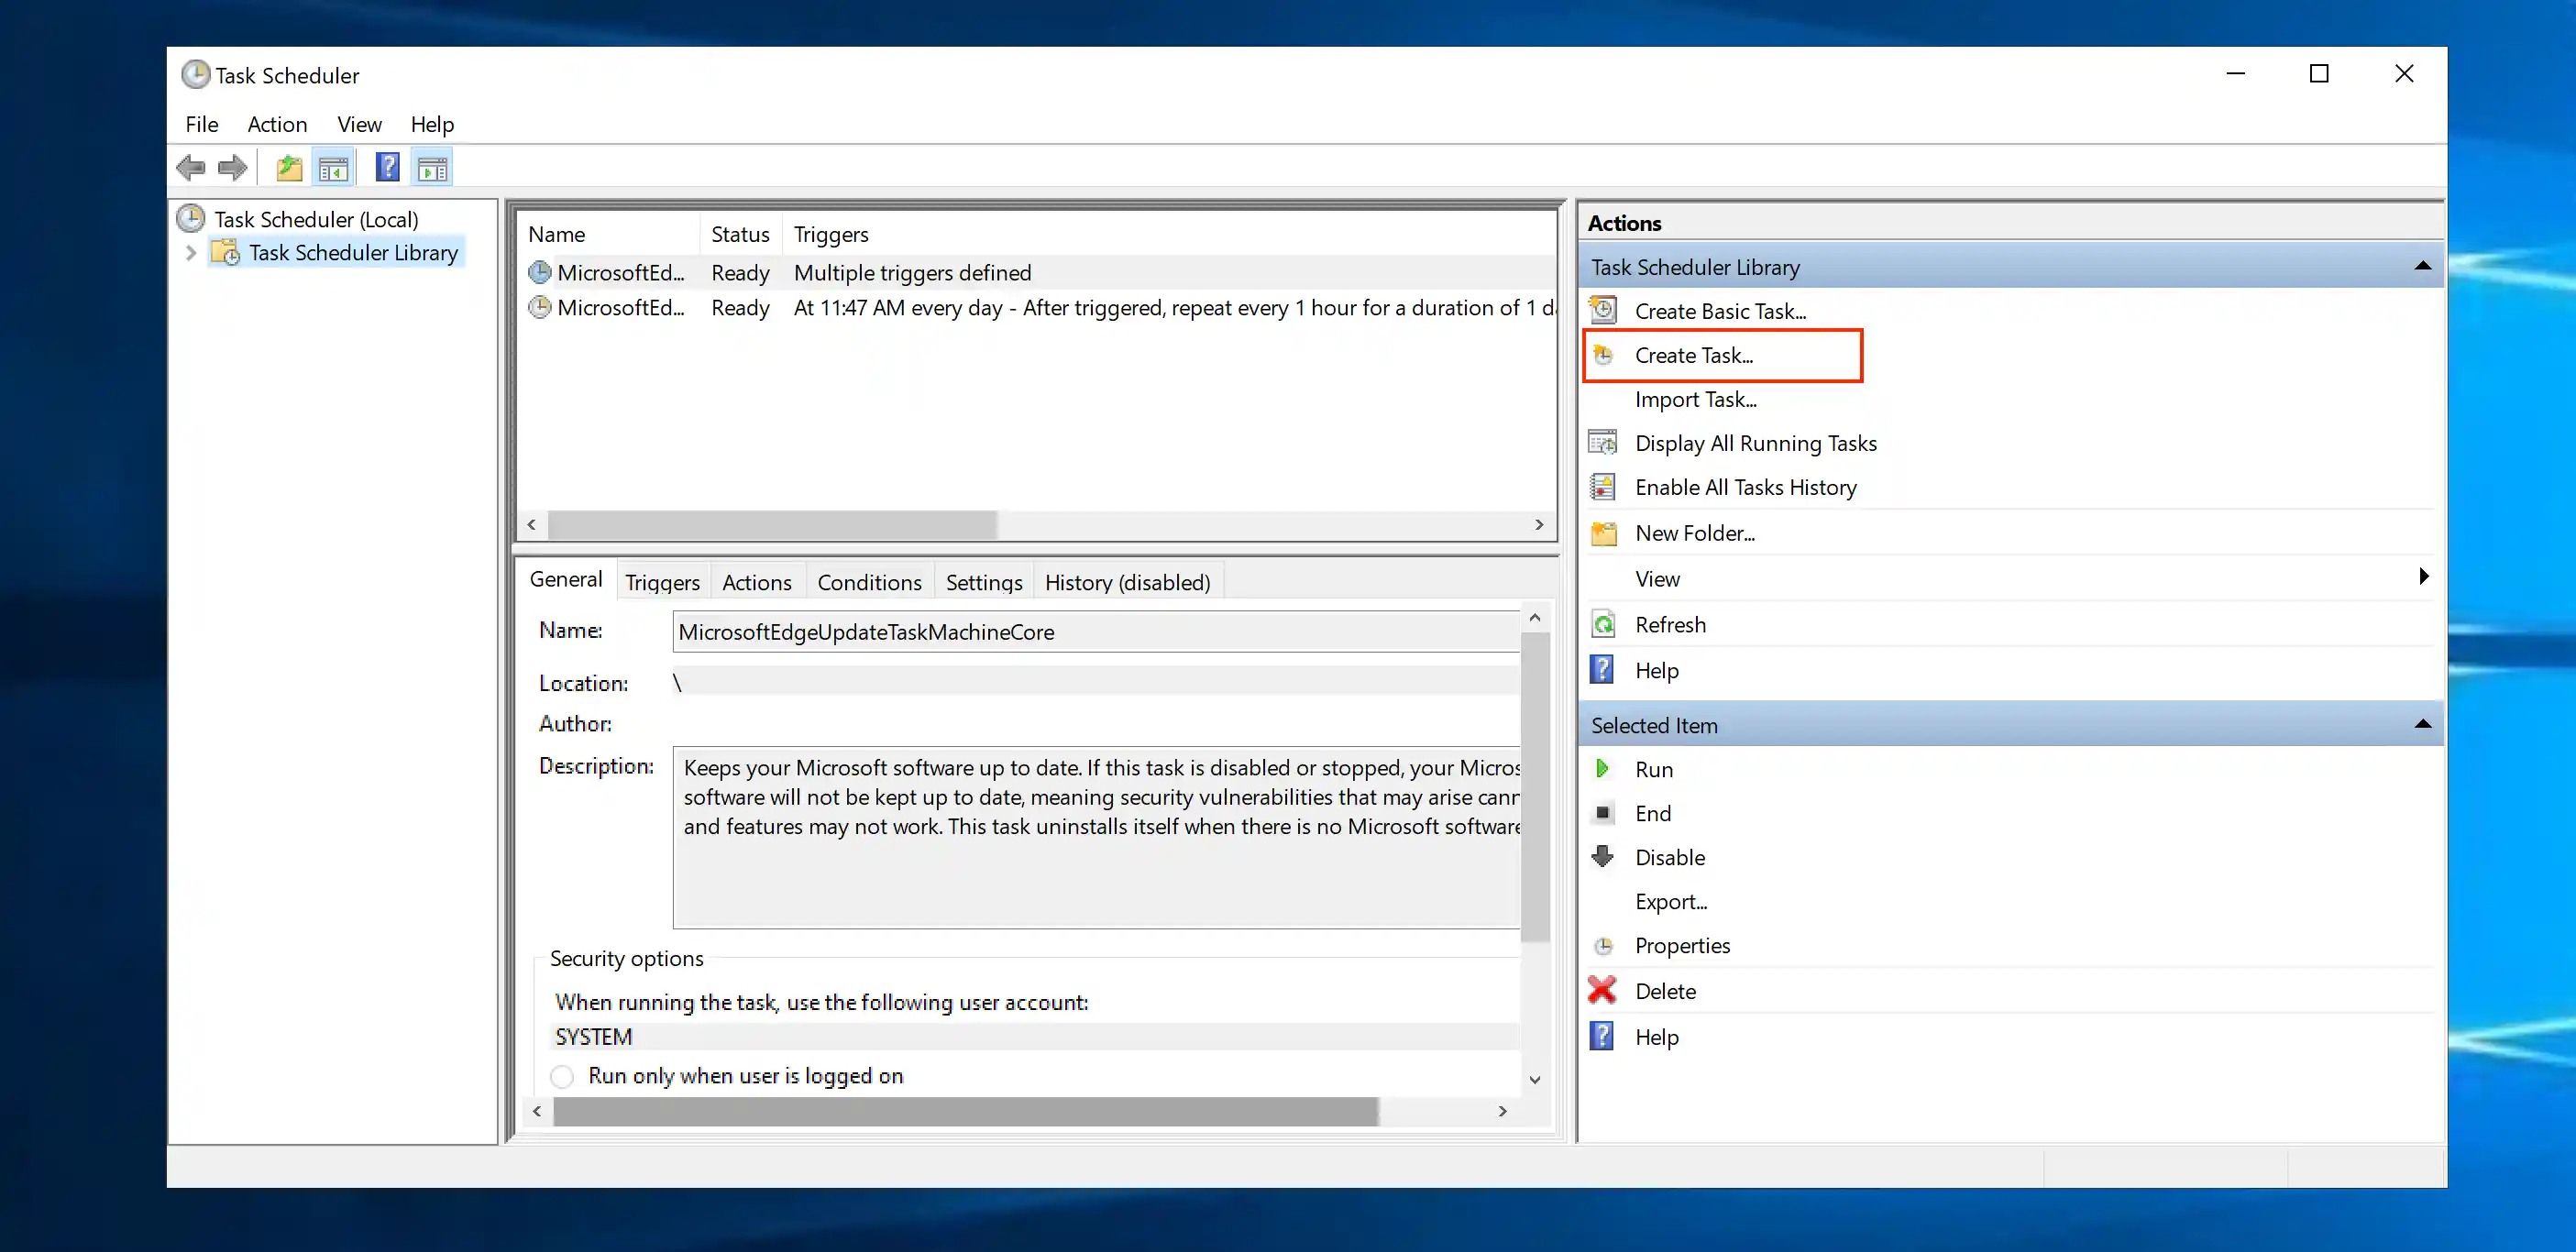
Open the Task Scheduler by typing task scheduler in the Windows search bar and hitting return:

Click on Create Task... in the Actions Sidebar of the Task Scheduler:
This opens a Create Task window. Give your task a descriptive name in the Name field under the General tab:

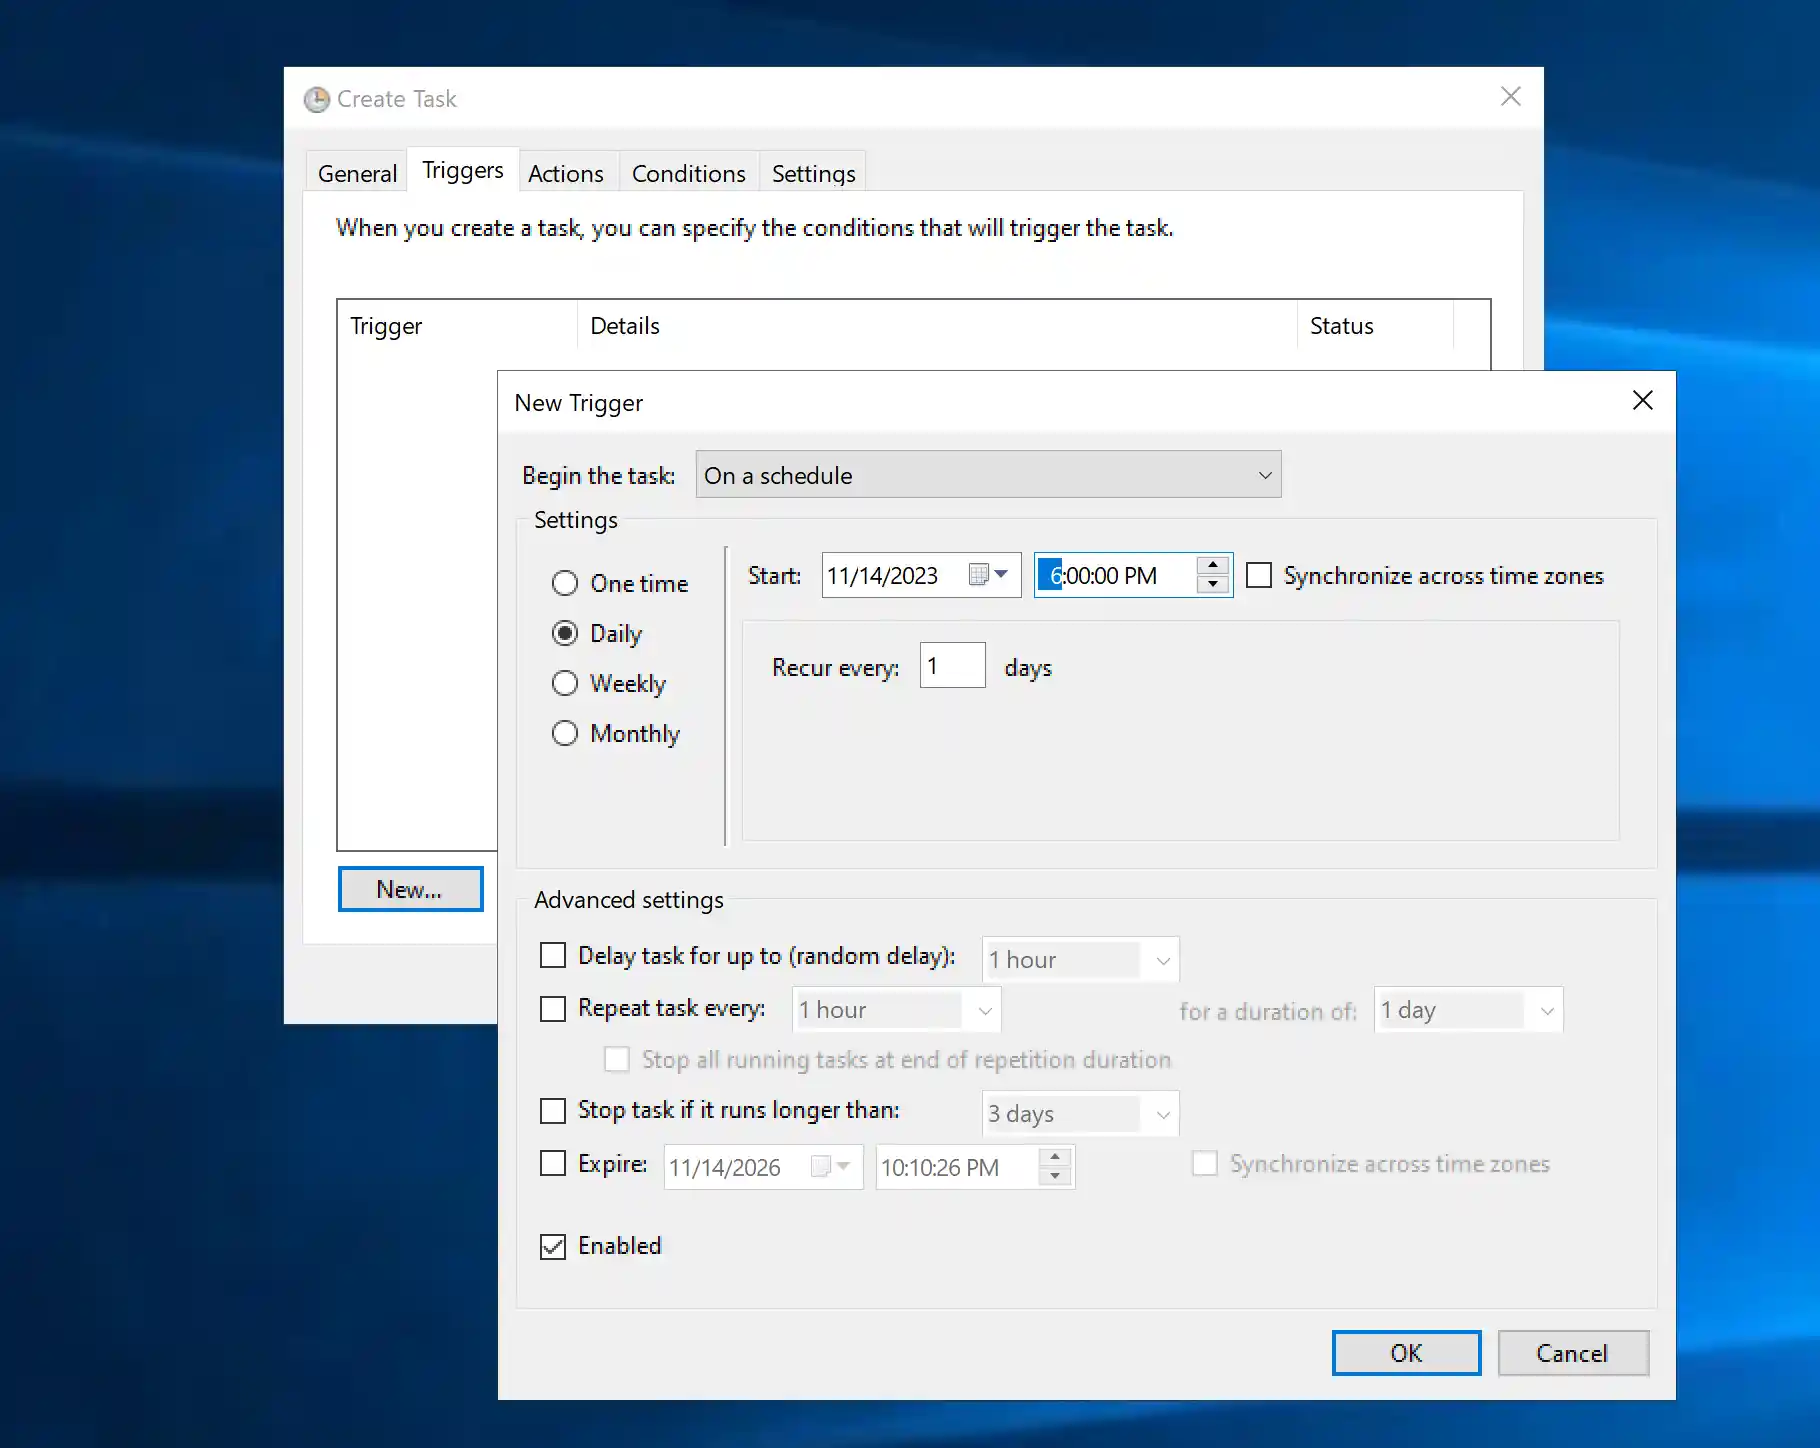
Navigate to the Triggers tab and define a new daily trigger and hit OK:
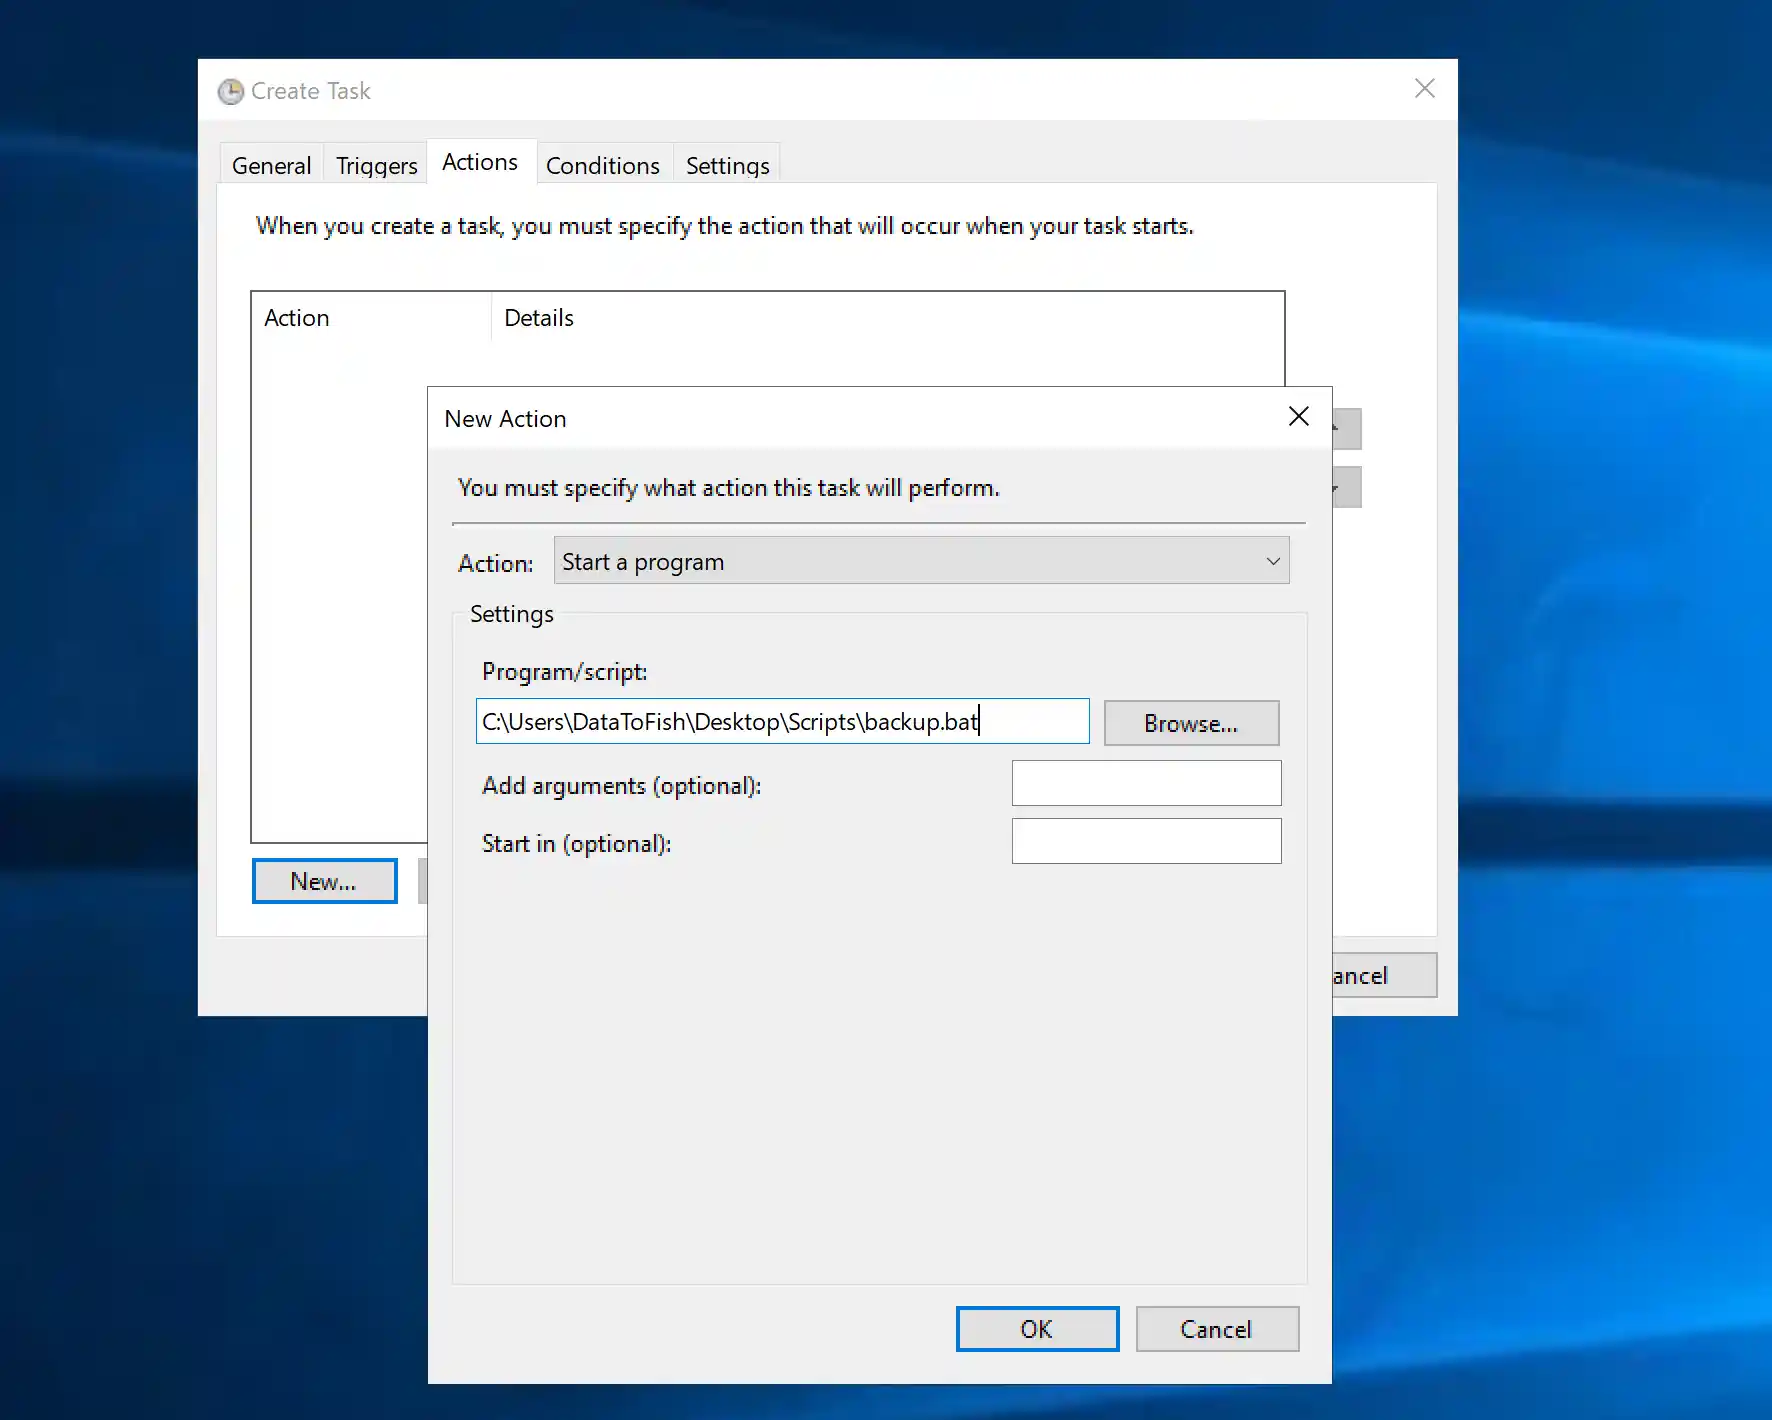
Navigate to the Actions tab and define a new action. Click on Browse and locate your batch.file and hit OK:
Hit Ok in the Create Task window to save your task.
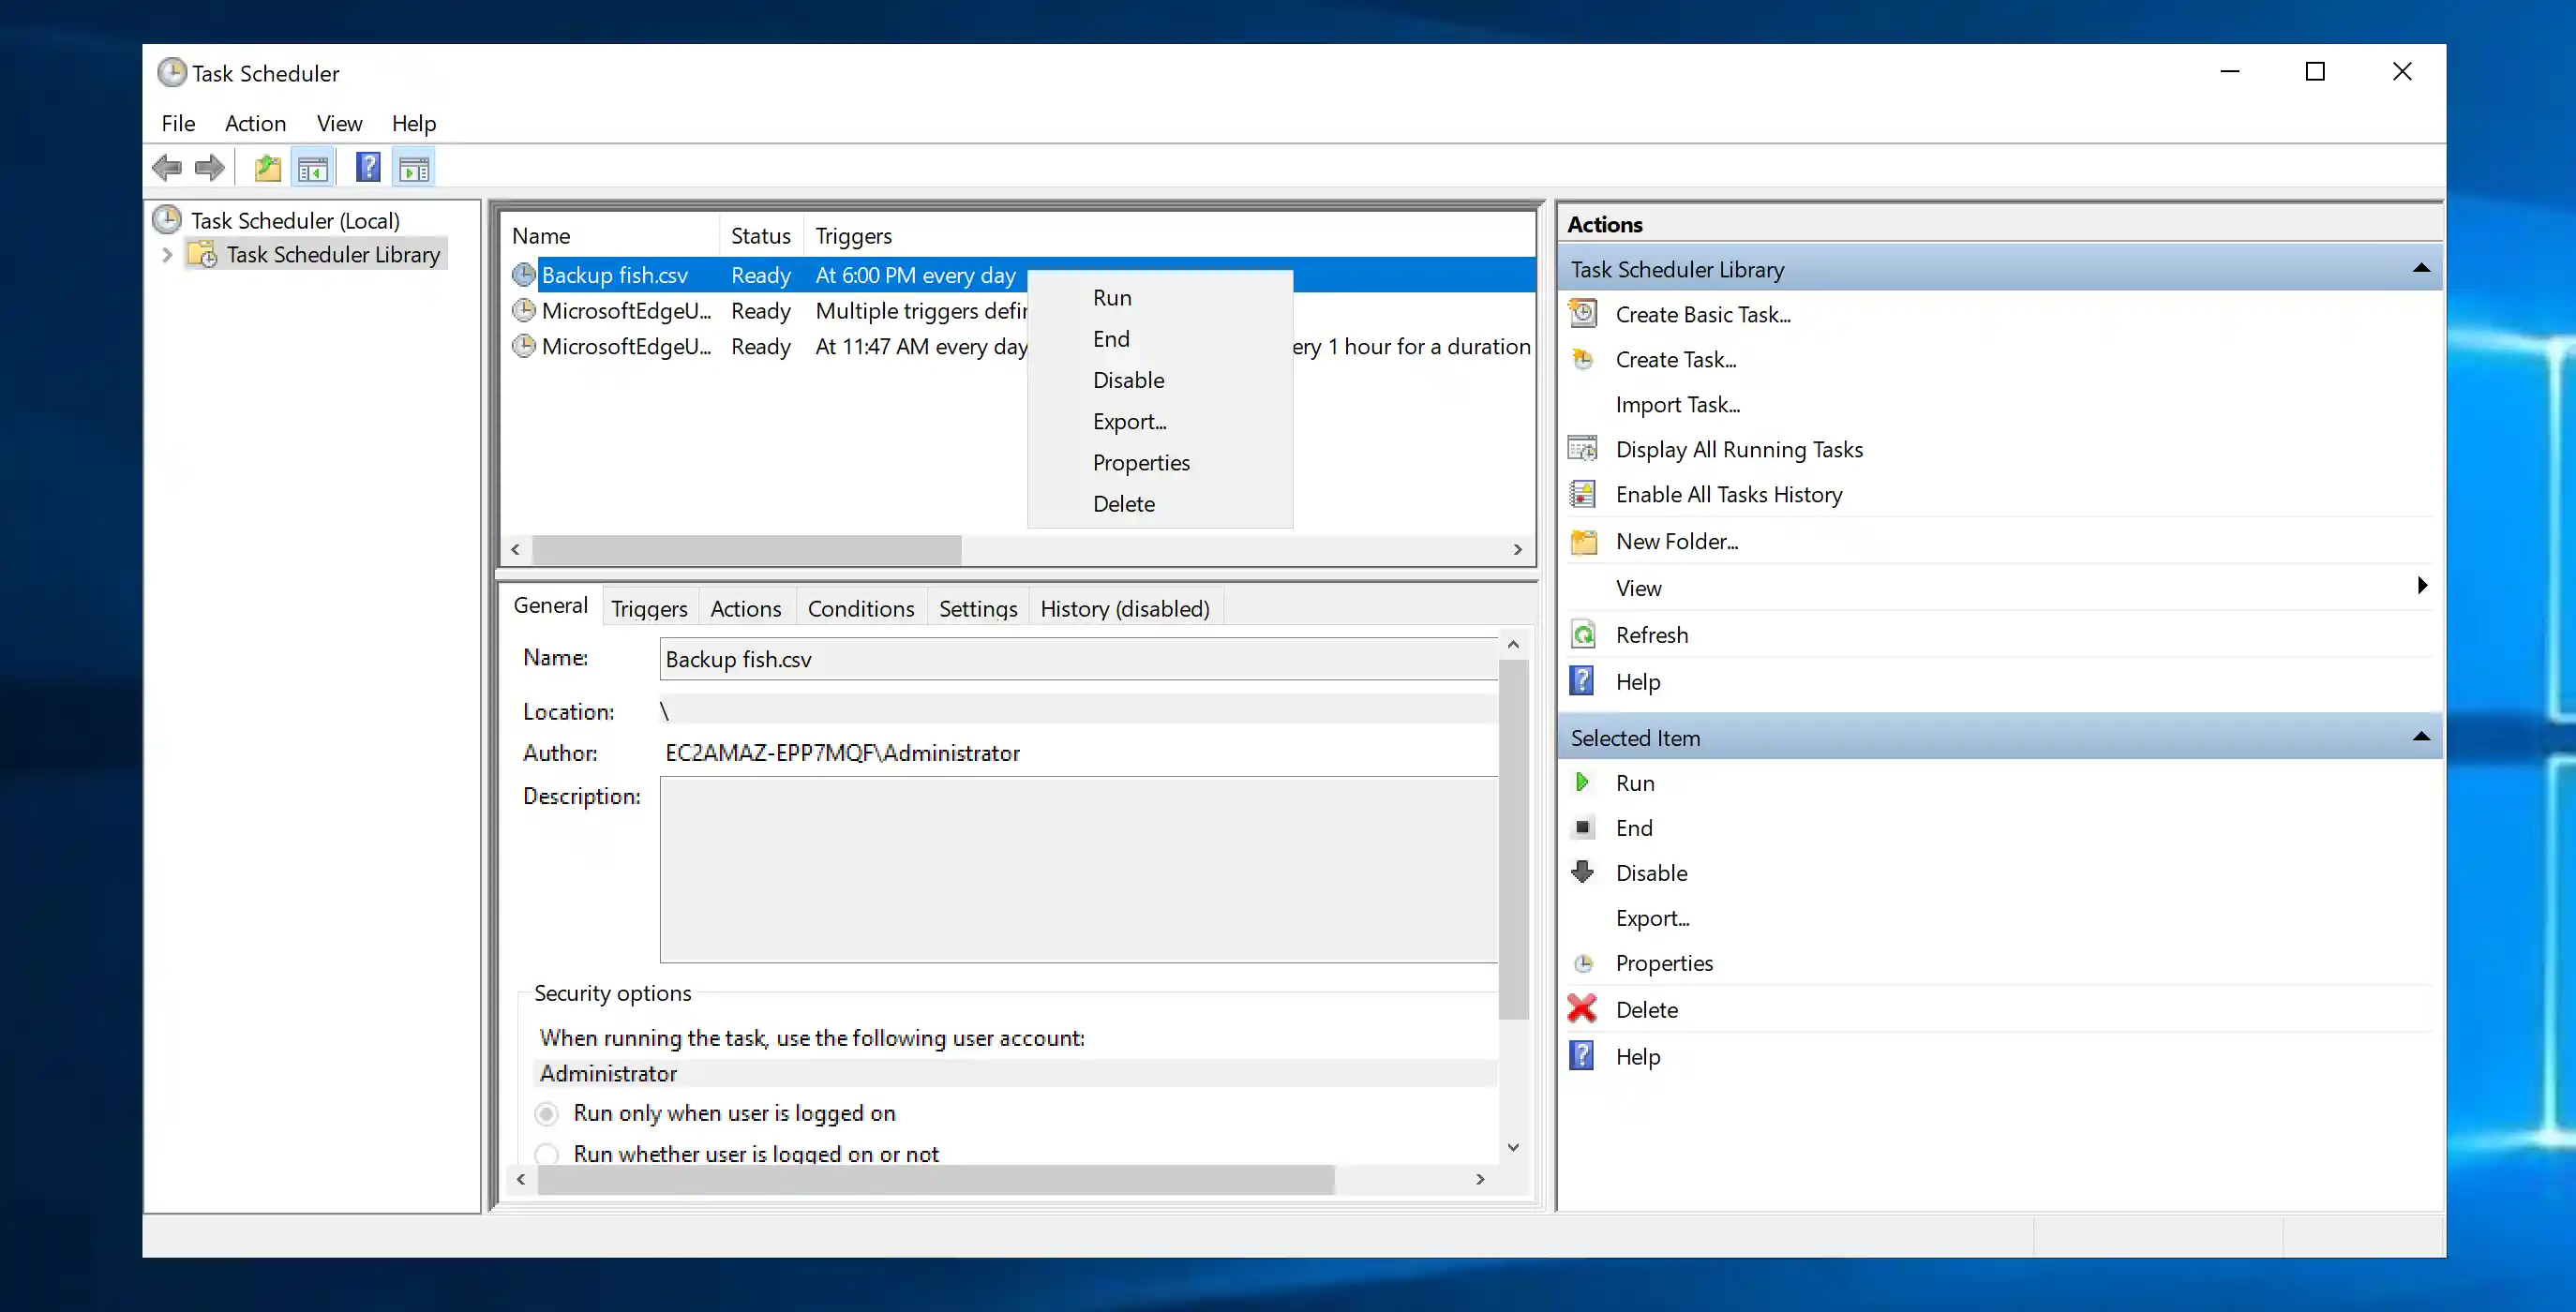
Verify that your task works by right clicking the relevant entry and clicking Run:
You should now find a fish.csv file in your Backups folder.
That's it! You just learned how to schedule a Python Script using the Windows Task Scheduler.